


The only self-leveling quilt hanger on the market! Slide the adjustable hanger rod into a sleeve sewn on the back of your quilt, attach the bracket in the center, then hang your quilt. It will automatically hang straight and level! Click here for printable instructions
Self-leveling - No tools required - Change to a different size quilt in seconds - Supports 40 pounds - Will not damage any quilt - Eliminates damage to walls - Heavy duty anodized aluminum will last a lifetime - Adjustable length - One person can hang any size quilt by themselves -
Lifetime warrantyItem #C3563 adjustable from 35" - 63"
Instructions:
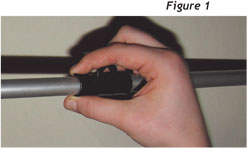
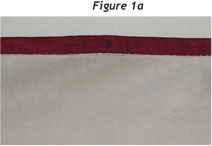
1. Remove the hanger bracket from the hanger rod by pulling one end of the bracket off of the hanger rod (Figure 1).Set the hanger bracket aside, you will use it in step four (4). Find the center point along the top edge of the quilt by folding the quilt in half (widthwise) and mark the center fold with a straight pin (Figure 1a).
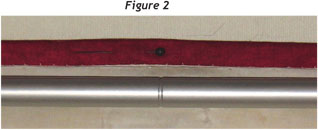
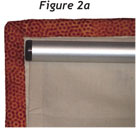
2. Place your quilt on a flat surface with the back side up. Make sure the sleeve lies flat and straight. Lay the hang it dang it on the sleeve with the center mark aligned with the straight pin (Figure 2). Loosen the end tubes with a slight twist and extend each end tube out to the edge of the sleeve and gently retighten (Figure 2a). It takes very little effort to lock the tubes in place, be careful to not over tighten them. At this point, the center mark of the hang it dang it should align with the straight pin and the end tubes should align with the outer edges of the sleeve.
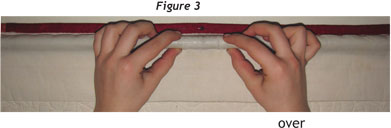
3. Insert the hang it dang it rod into the sleeve keeping it snug to the top edge of the sleeve (Figure 3) with the ends aligned with the edges of the sleeve. (Figure 3a)

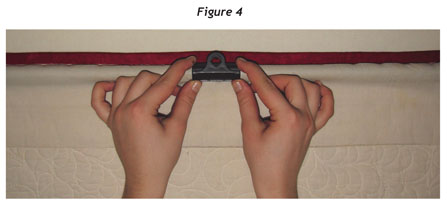
4. Attach the bracket to the hang it dang it rod by grasping the hanger bracket firmly on each end and snapping it onto the hanger rod in the center (which is now under your sleeve fabric) (Figure 4). This step may take a couple of tries until you get the feel for it. Be careful not to pinch a finger between the bracket and the hanger rod. (to remove bracket see step 6)
Hang your quilt on the wall and enjoy! All the while knowing you can change quilts just as fast and easy!
5. To remove the hanger bracket place your quilt on a flat surface and hold the rod down with one hand and with your other hand, pull the bracket off by pulling back on the tab (Figure 5).

If your quilt is not hanging level, this either means the hanger bracket is not centered or the weight is not evenly distributed. You can adjust this by grasping the quilt and hanger rod in one hand and sliding the hanger bracket slightly towards the lower hanging corner. If this does not solve the problem, go to step 6 and then repeat steps 1 through 4.
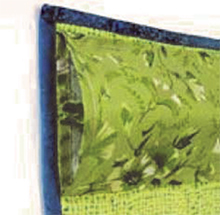
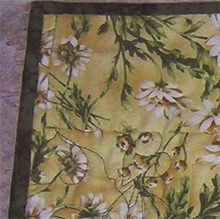
If your quilt does not lay flat on the wall or puckers in the front, check your sleeve to see if it has enough room to accommodate the hanger. Your sleeve should look like the regulation style quilt sleeve on the left. If your sleeve is flat like the one on the right, you will need to move the bottom edge up or remove a section in the middle creating a two part sleeve.
We would love to see your quilt; please email us a picture of your quilt along with a description of it and we will post it on our website for others to enjoy as well. Your feedback is important. For questions or comments please contact: customerservice@hangitdangit.com or call 307-760-5279
